A target image can be generated from an Image Description file by using the Image Builder. To export a target image with the Image Builder:
Launch the OSGi image builder export wizard for the image:
Open the Image Description file in Eclipse and click the Export image option from the Testing section of the editor.
Right-click on the Image Description file in the navigation view and use File > Export menu option. Then, expand the OSGi node and select the OSGi Image node to launch the corresponding wizard. Click Next.
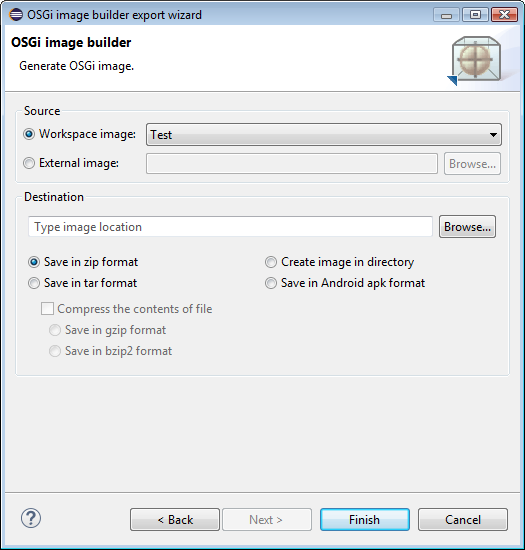
In the OSGi image builder export wizard specify:
In the Source pane specify the Image Description file that will be used for generating the new target image. The source is automatically set to be the Image Description you have selected from the workspace at launching the wizard.
Select another Image Description file from the workspace from the Workspace image drop-down list. In case the Image Description file resides outside your workspace, specify the location of the .img file under External image.
Click Finish to generate the target image, or Cancel to exit the wizard.
The generated target image should now be manually uploaded to the target device.