Previous Topic

Next Topic

Book Contents

Book Index

Creating a Remote OSGi Framework Launch Configuration

To create a remote OSGi framework launch configuration in Eclipse:
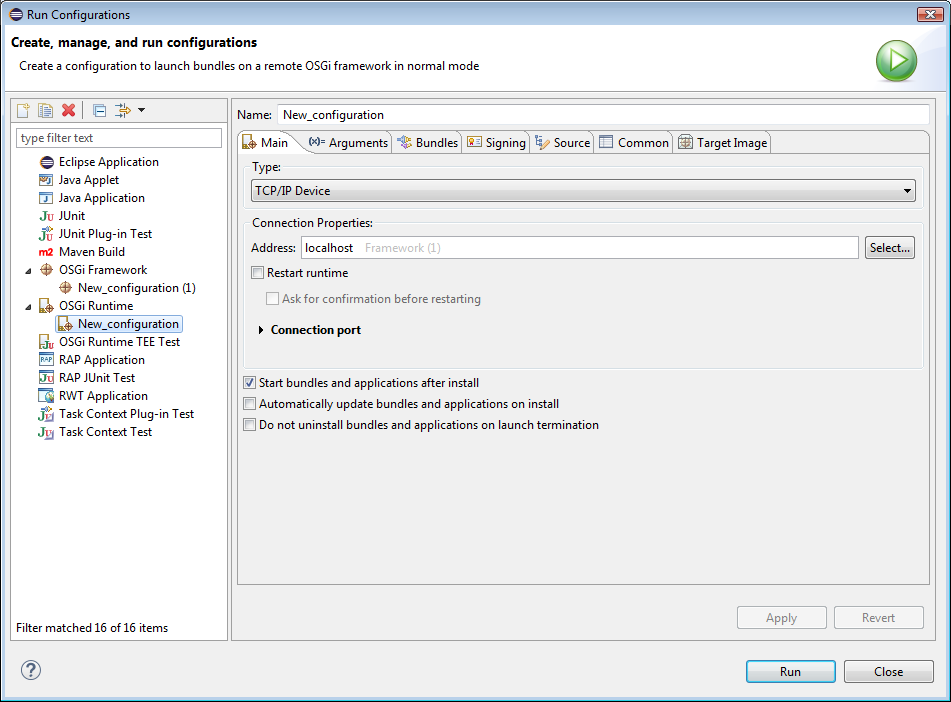
  1. Open the Launch Configuration dialog of Eclipse by using the menu command Run > Run Configurations or Run > Debug Configurations.
  2. Create a new launch configuration of type OSGi Runtime – right-click the OSGi Runtime node and select New. The OSGi Runtime launch configuration represents a connection configuration to a specific OSGi Runtime. The configuration name will start with New_configuration – you might rename it if needed in the configuration's Name field.
  3. In the Main tab, fill in the settings for the connection to the remote framework:

  4. Next, go to the Bundles tab and choose the bundles you want to install on the remote OSGi framework from the ones available in your Workspace as Plug-in Projects or Maven Projects as well as from the ones in the active PDE target platform. In addition, you can also include collections of bundles defined as PAR Projects.

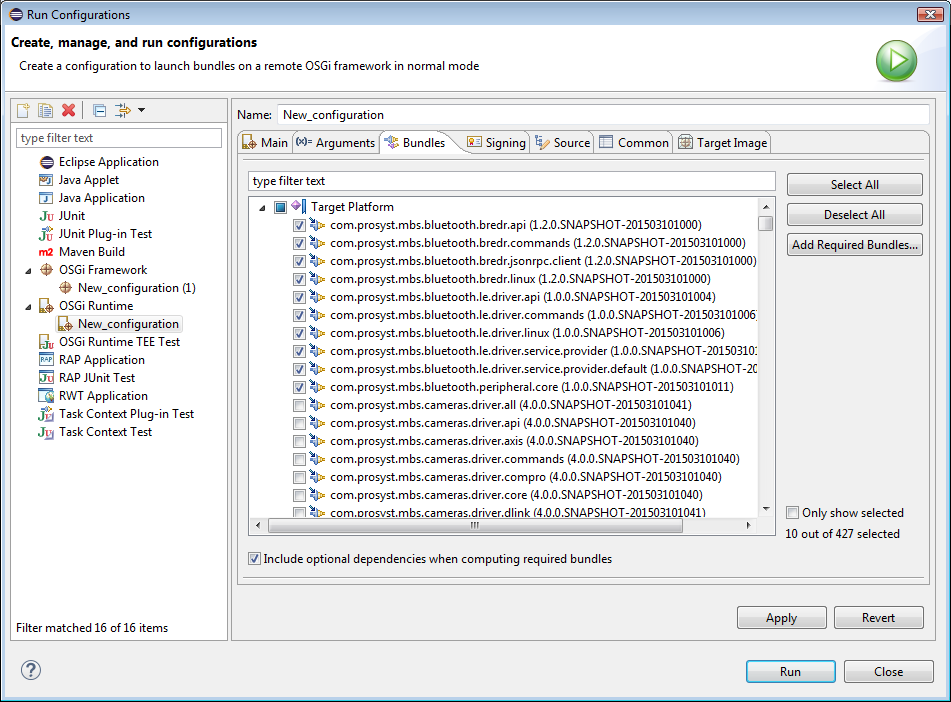
    Use the Add required bundles button to include the bundles from the workspace and target platform required by the ones you have already selected – in this way you can easily resolve the dependencies within the remote OSGi framework.

    Select bundles from the Target Platform option with extra care, since the JVM of the remote OSGi framework is supposed to be running already and changing the framework's target platform may lead to unexpected collisions.

  5. Optional. To sign the bundles from the Bundles tab prior to their installation on the remote OSGi framework:
    1. Configure signer keystores in mToolkit preferences page and the path to jarsigner.exe from a JDK image.
    2. Back into the remote OSGi framework launch configuration, go to the Signing tab and check the box Sign content before deployment and then select the signer certificates from the ones set in mToolkit's preferences: