Device features
To follow this page, your entry point is Bosch IoT Suite UI (Developer console) > Devices .
You are already familiar with the available device information and most of the device resources. In this page we are going to focus on the device features. The data related to a feature is managed in the form of a list of properties. These properties can be categorized, e.g. to manage the status, the configuration or any fault information.
Table of contents:
To work with the features of a particular device, just select Features from the right column of the Device blade and the Features blade will open to the right.
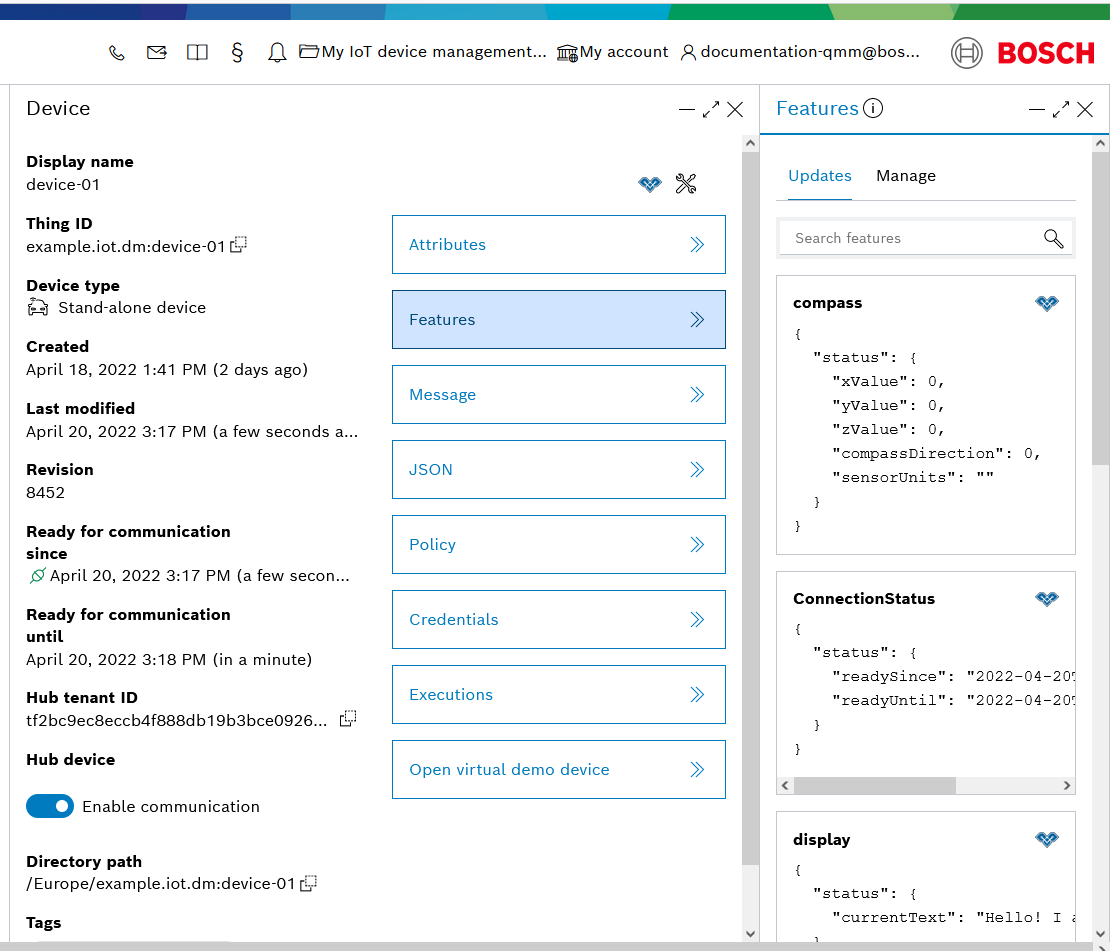
The Features blade is separated in two sections, the Updates view and the Manage view.
Updates view
The Updates tab is selected and open by default. It displays all features of the device and their current property values. When a property value of a feature changes, the tile of the related feature is highlighted.
See what happens when we connect our device which already has a couple of features:

We could say that this view is intended for monitoring purposes.
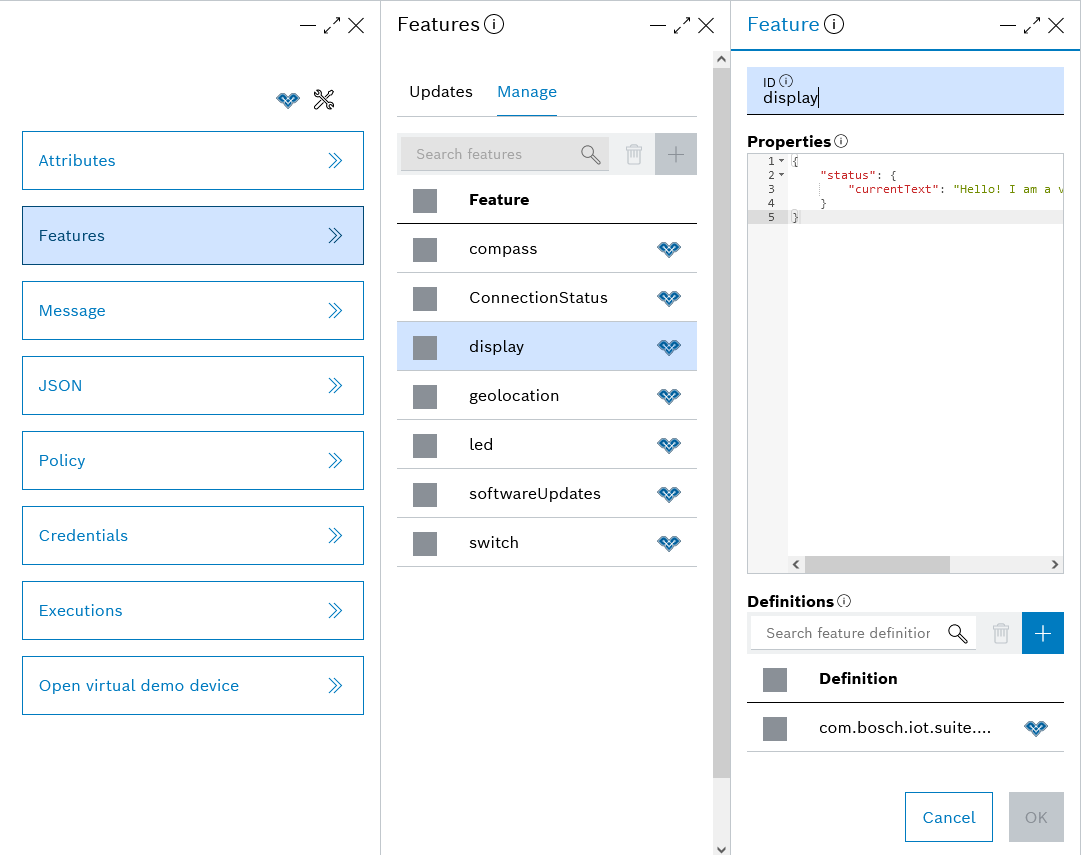
Manage view
The manage view as its name suggest allows you to:
view feature information, its properties and definition
create, edit and delete features
search for features
set feature properties
manage the feature definitions
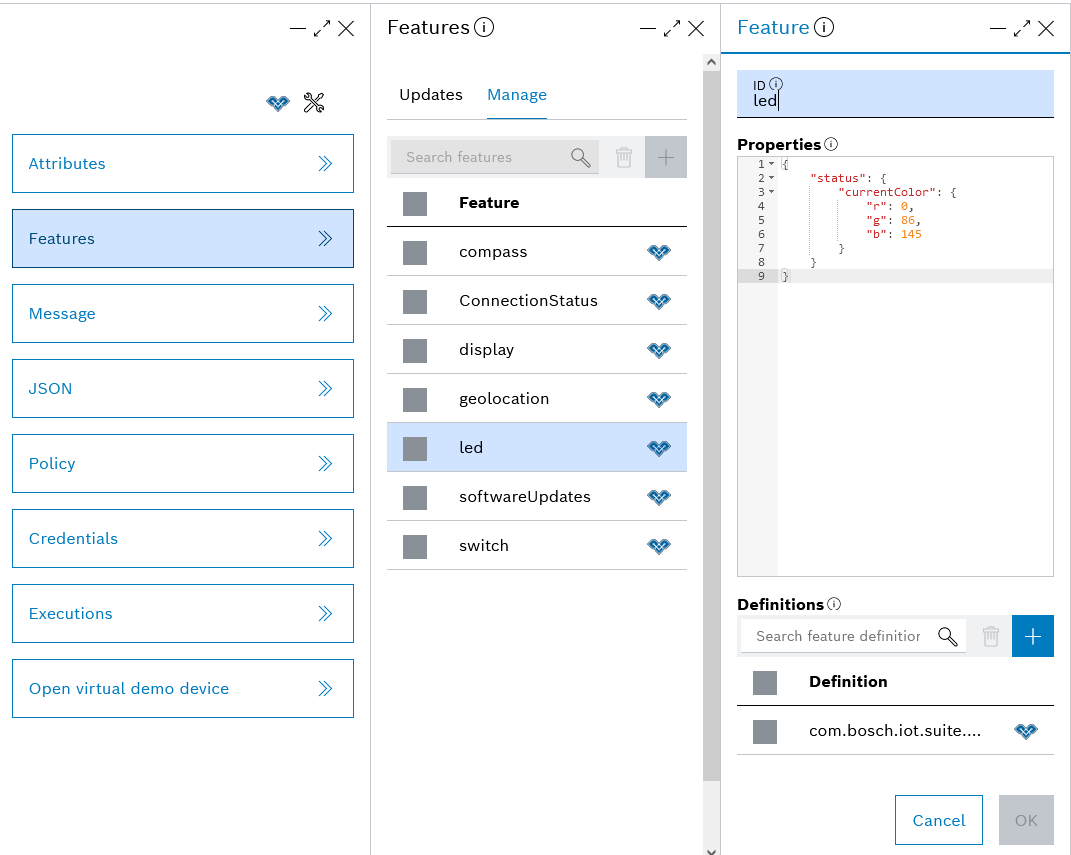
View feature information
To view the information of an already existing feature select it from the Manage view.
As part of the Feature blade you will find:
The ID of the feature - a unique string to identify the feature.
The feature properties in JSON format.
The feature definition.
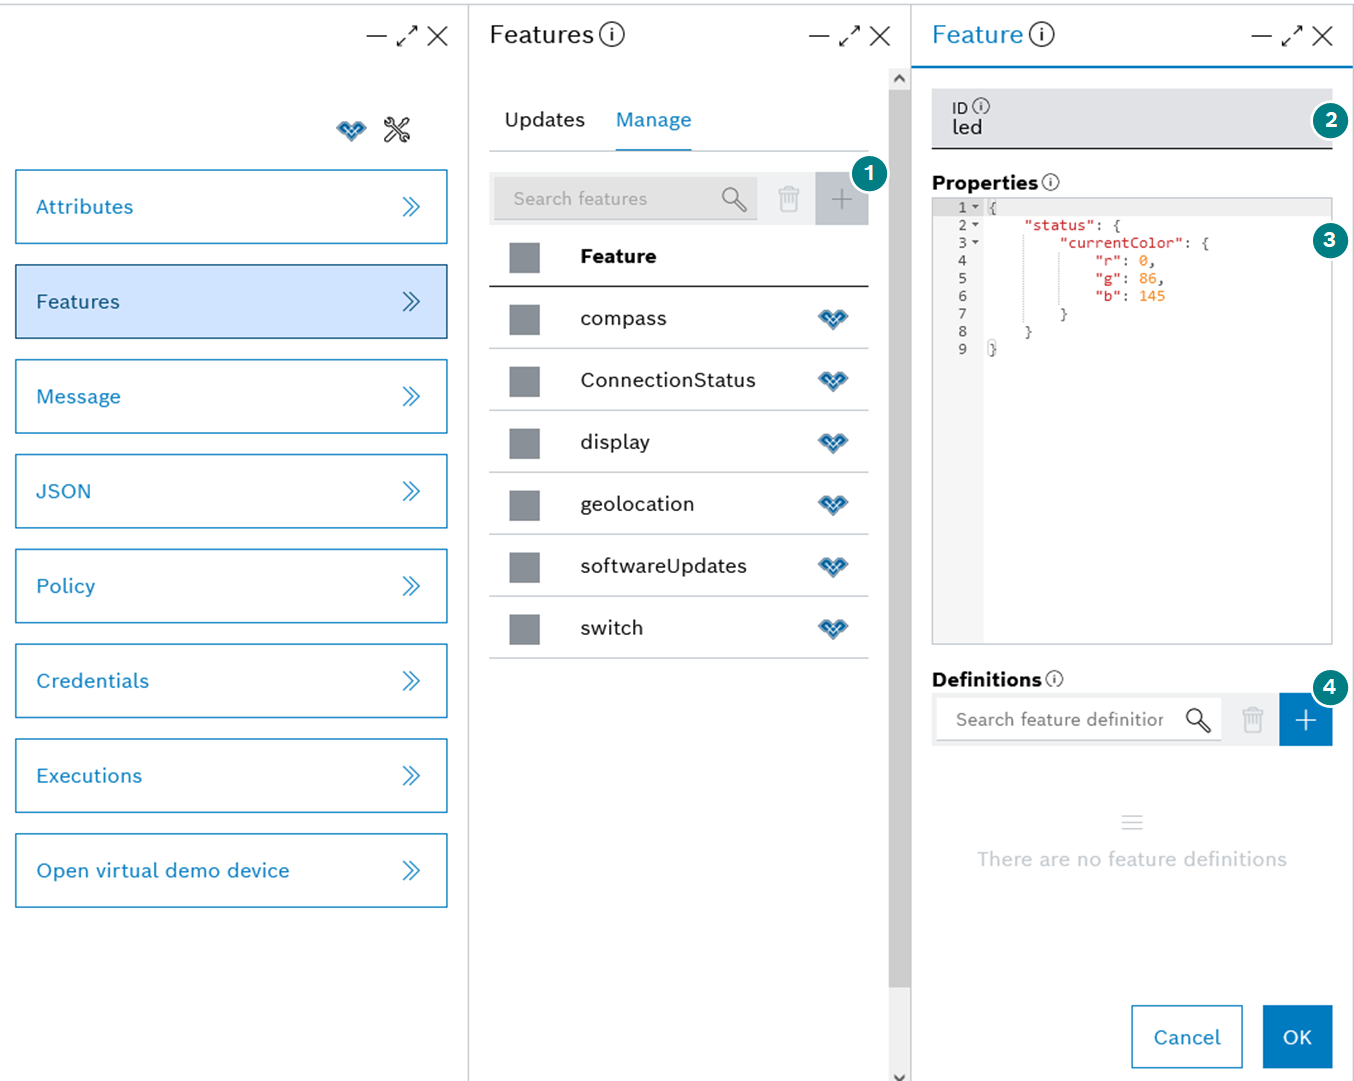
Add a feature
To add a new feature follow the steps described below:
Click the Add feature blue button and type in the needed feature information.
Type in the feature ID.
Add the feature properties as a JSON object.
Add a feature definition by clicking the blue Add definition button.
The Vorto model definition should follow the standard convention for Vorto models, in particular namespace:name:version. It should be the ID of an existing model or one that is expected to be created, in order to benefit from the capabilities defined in it.In addition, you may configure access to your private Vorto repository and use your private Vorto models stored in it. Check how to do that here.
In our example we will create a feature using the already existing LedLamp Vorto model.
You can get the needed definition ID of an already existing Vorto model of the from the Vorto models UI feature as shown below:

In our example it is com.bosch.iot.suite.example:LedLamp:1.0.0.Paste the definition ID in the field and click OK.
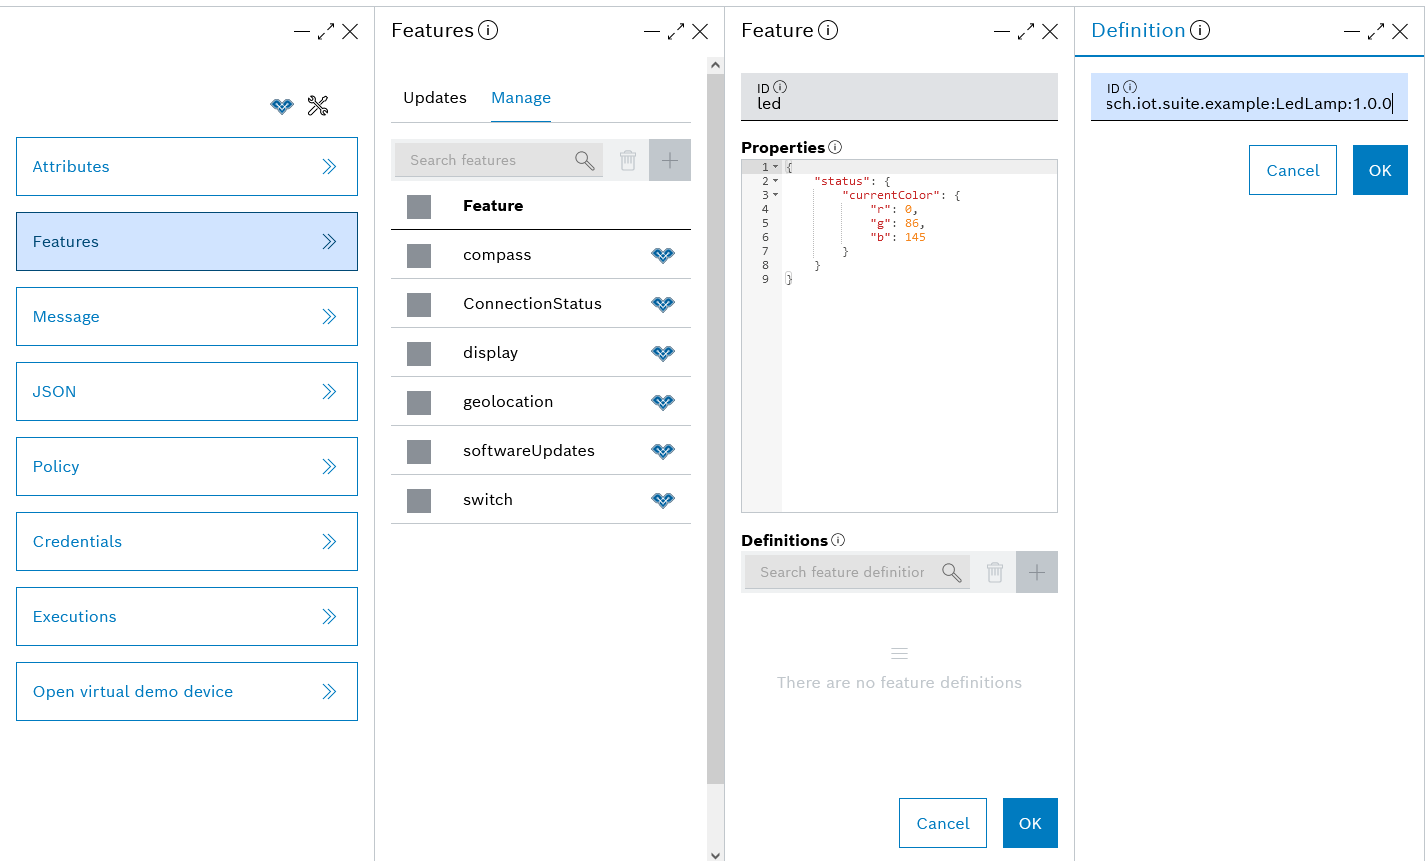
Once you click OK on the Feature blade the new feature will be added to the list of device features.
Edit feature properties
The data related to a feature is managed in the form of properties. These properties can be categorized, e.g. to manage the status, the configuration or any fault information.
To edit feature properties just select the feature from the Manage view and change any values in the Feature blade as shown above.
The current state represents the properties and their values currently reported by the device. The desired state, on the other hand, reflects the desired properties and values that you, or an application respectively, wish to apply on the device, for example in order to change its configuration or behavior. In order to set the properties of a device, it should be online - otherwise the changes will be lost after the device comes online. However, if you set the properties as desired properties, they will be persisted in the desired state of the feature and will be applied when the device comes online, unless the device rejects them.
Set desired properties
Desired properties aim to trigger the device integration layer to change the device configuration. You can only define desired properties on existing features. Setting new desired properties on a feature will overwrite older values.
Use the section Desired properties to enter properties that trigger the device integration layer to change the device configuration.
Select a feature.
Open the Desired properties panel.
Type in the new values in JSON format.
You can even view the differences to the actual properties states in a diff editor by clicking Show diff.

When satisfied with the new values, click OK.
The desired properties need to be implemented by the device firmware - device integration layer - too, in order to take effect.
Read more about desired properties at Things and features.
Delete a feature
To delete a feature:
Select it from the Manage view.
Click the Delete feature button on the right of the search.
