![]()
![]()
![]()
![]()
|
|
|
|
|
The Web Console is a developer tool and must not be used in production.
By installing a bundle you provide its resources to the framework. To install new bundles, follow the instructions:
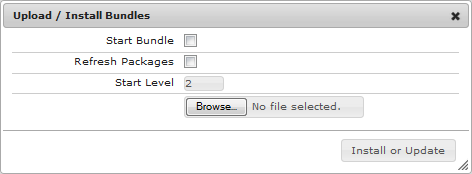
If there is a bundle with the same symbolic name already installed on the framework, the respective bundle will be updated with the new bundle file. Otherwise, the bundle JAR file will be installed as a new bundle and will be started in case all its bundle dependencies are resolved.
After a bundle is installed, it is in Active state if you have checked the Start Bundle option in the Upload/Install Bundles dialog. A bundle is in Resolved state if all package dependencies are satisfied and the Start Bundle option was not checked. If you install the bundle without the other related bundles, it will be in Installed state.
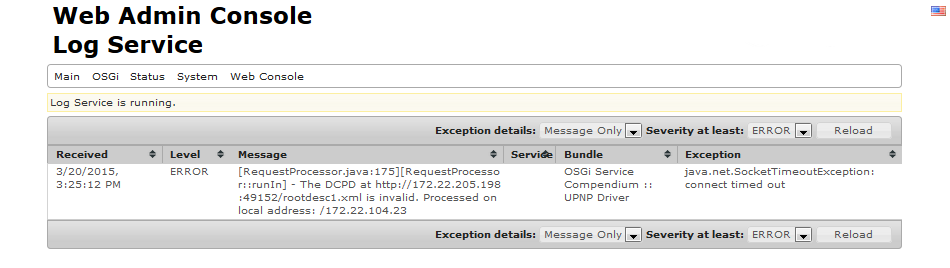
If the Web Console refuses to install your JAR file as a bundle, this might be due to a wrong manifest header or any other problem with the JAR or its components. To learn the exact reason, go to the Log Service page and see if there are any log messages concerning the install operation.