![]()
![]()
![]()
![]()
|
|
|
|
|
To manage ONVIF devices via the Web Console, you need the ONVIF bundles to be installed and running as described in Setup Guide in Working with Web Console guides.
The following steps describe how to discover or register new ONVIF cameras in the network.
Device Discovery
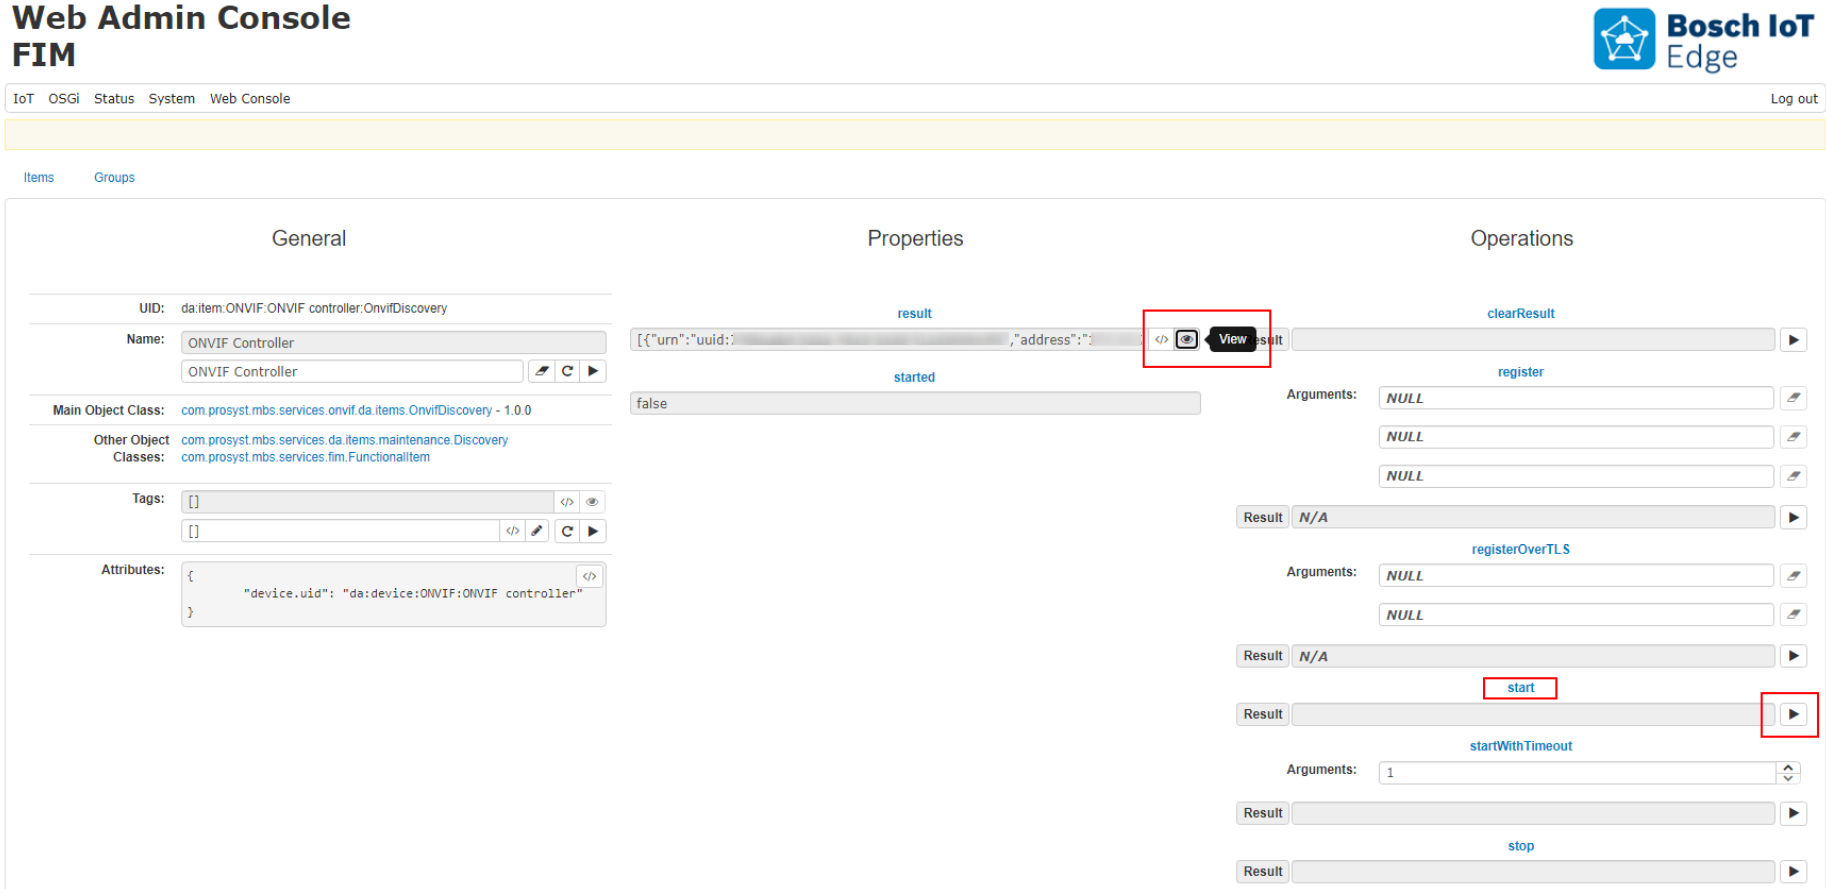
1. To display the currently available ONVIF devices, go to the IoT -> FIM tab of the Web Console.
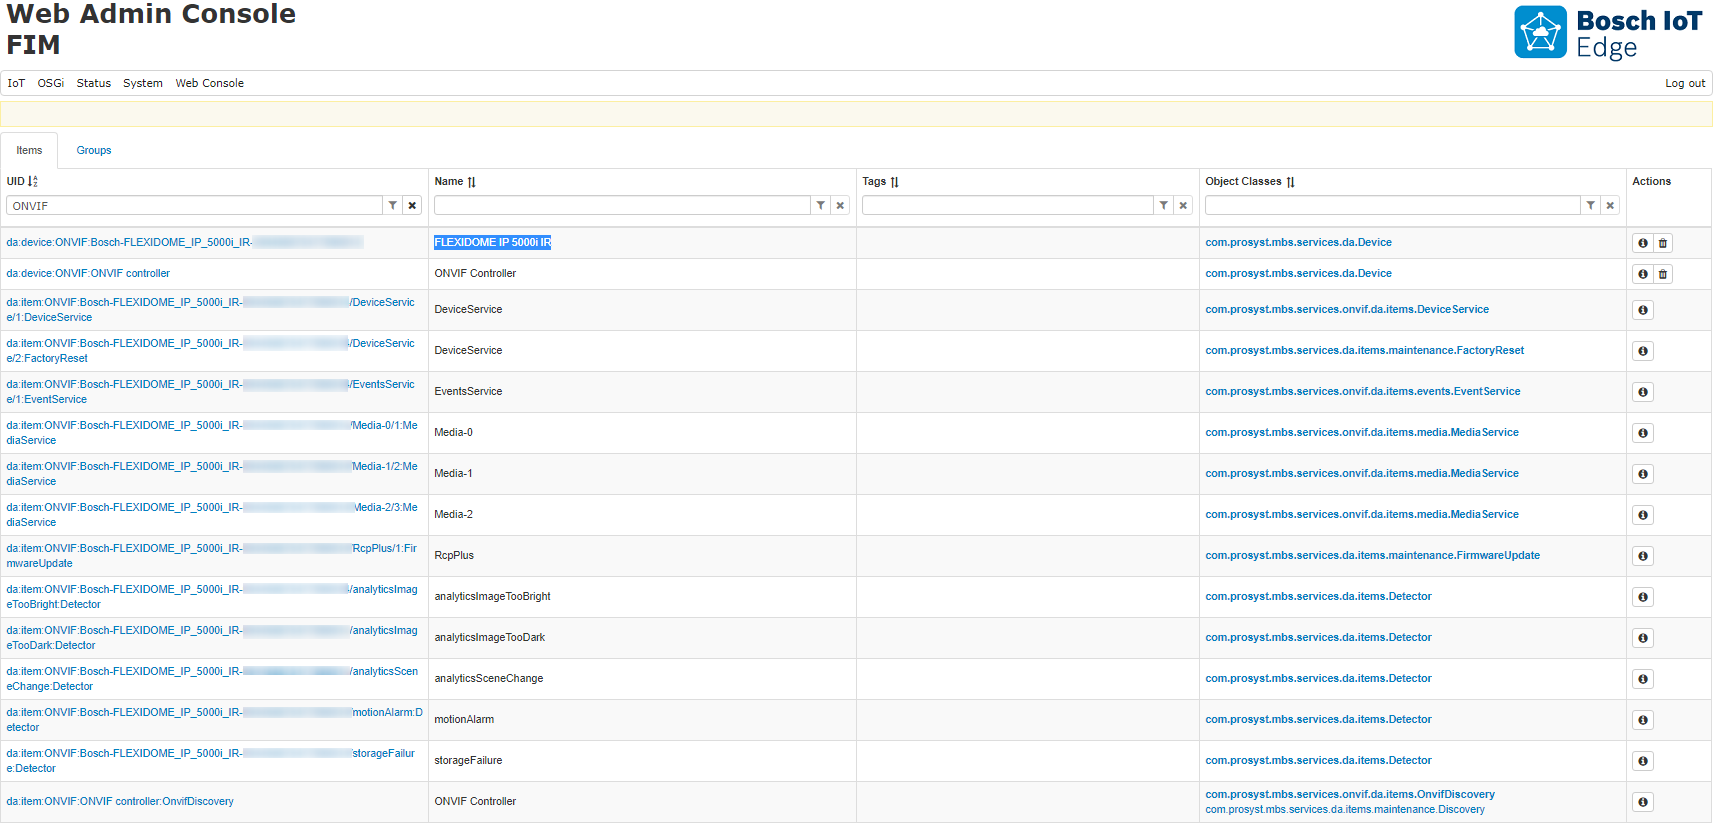
2. The Functional Items Management (FIM) page will display the physical devices currently included in the ONVIF network. Initially, you will see two items:

Click on the OnvifDiscovery item. The resulting page will have options to start the discovery of new devices:
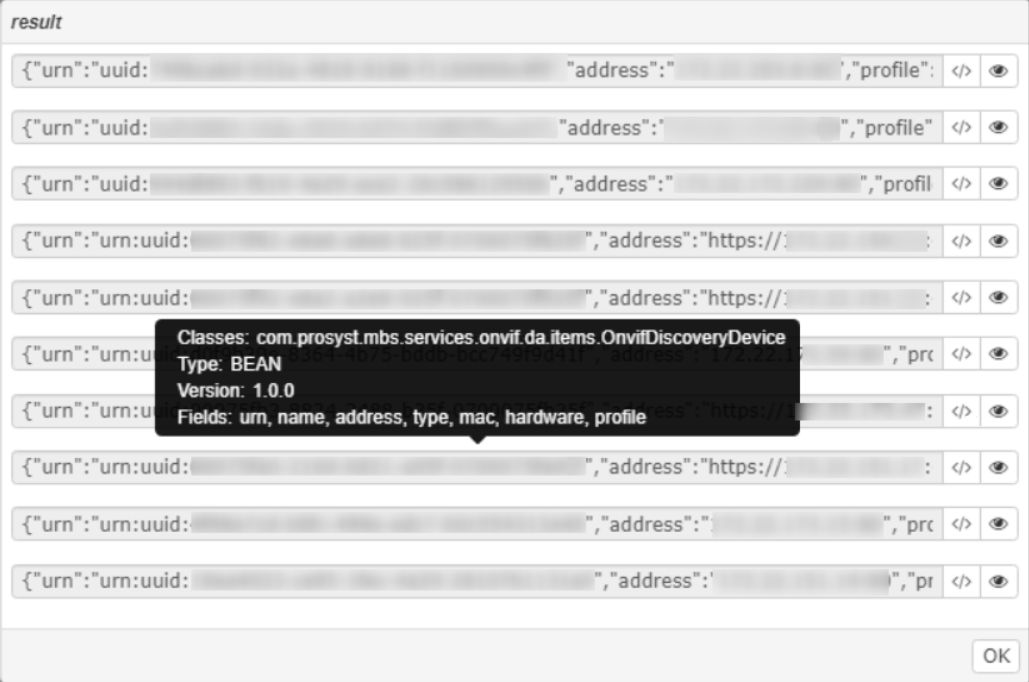
A dialog with a detailed result will appear:
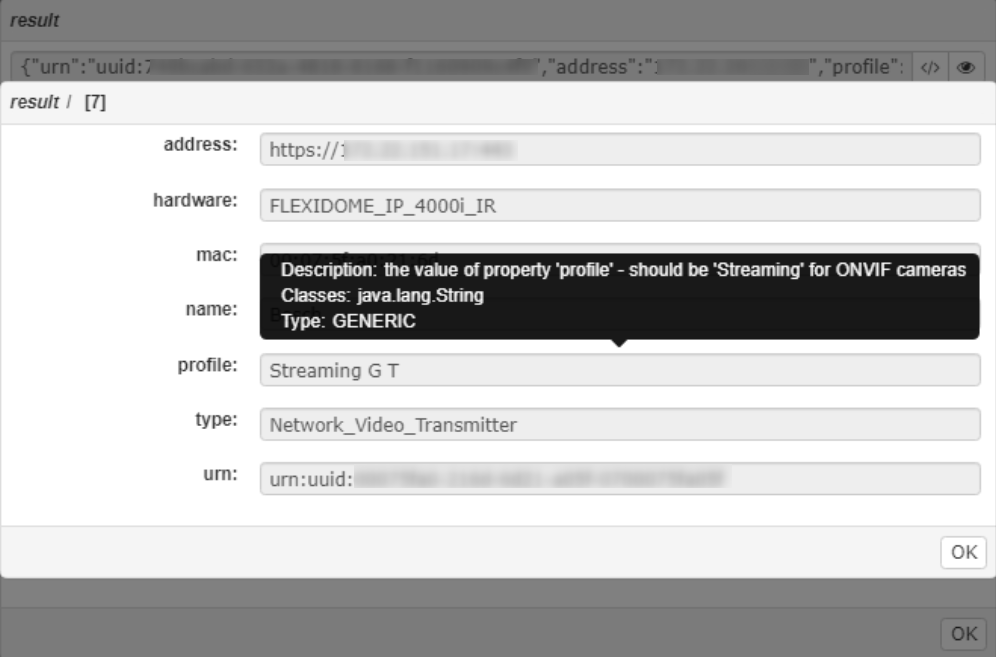
Press again the view button for each detected camera to see all camera details in a user-friendly view:
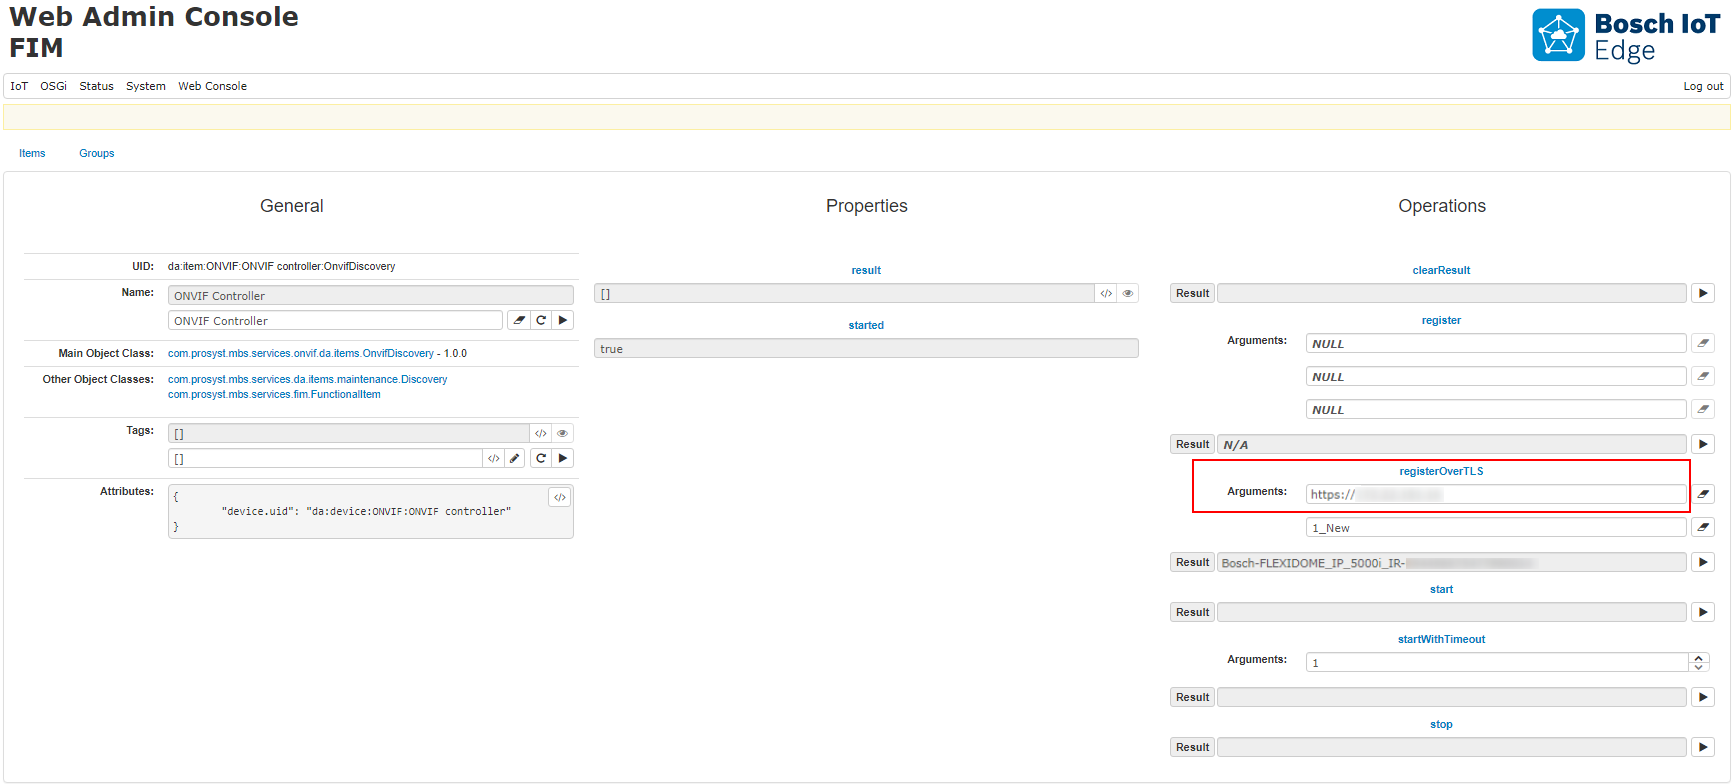
Registering a new ONVIF Camera
Using user credentials
On the main IoT > FIM page, click on the ONVIF Controller item. On the resulting page, fill in the parameters of the command register:
With HTTPS locations, you need to use a certificate. Refer to Validation of Camera Certificate.
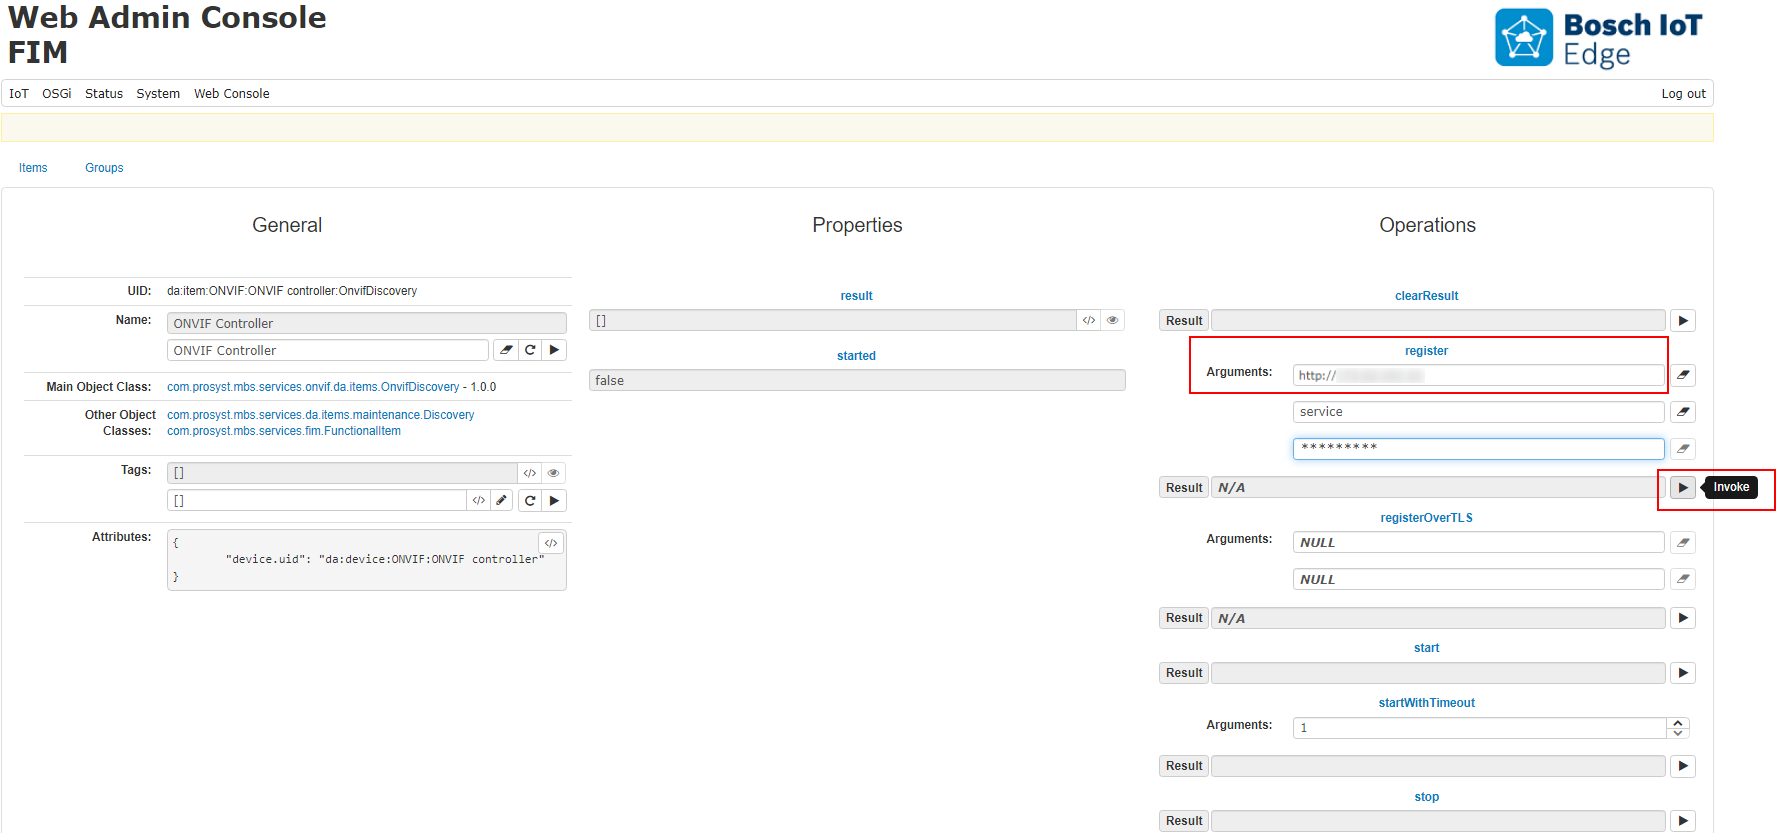
Press the Invoke button ![]() and wait several seconds for the registration process to complete.
and wait several seconds for the registration process to complete.
You should see the Camera identifier in the result field:
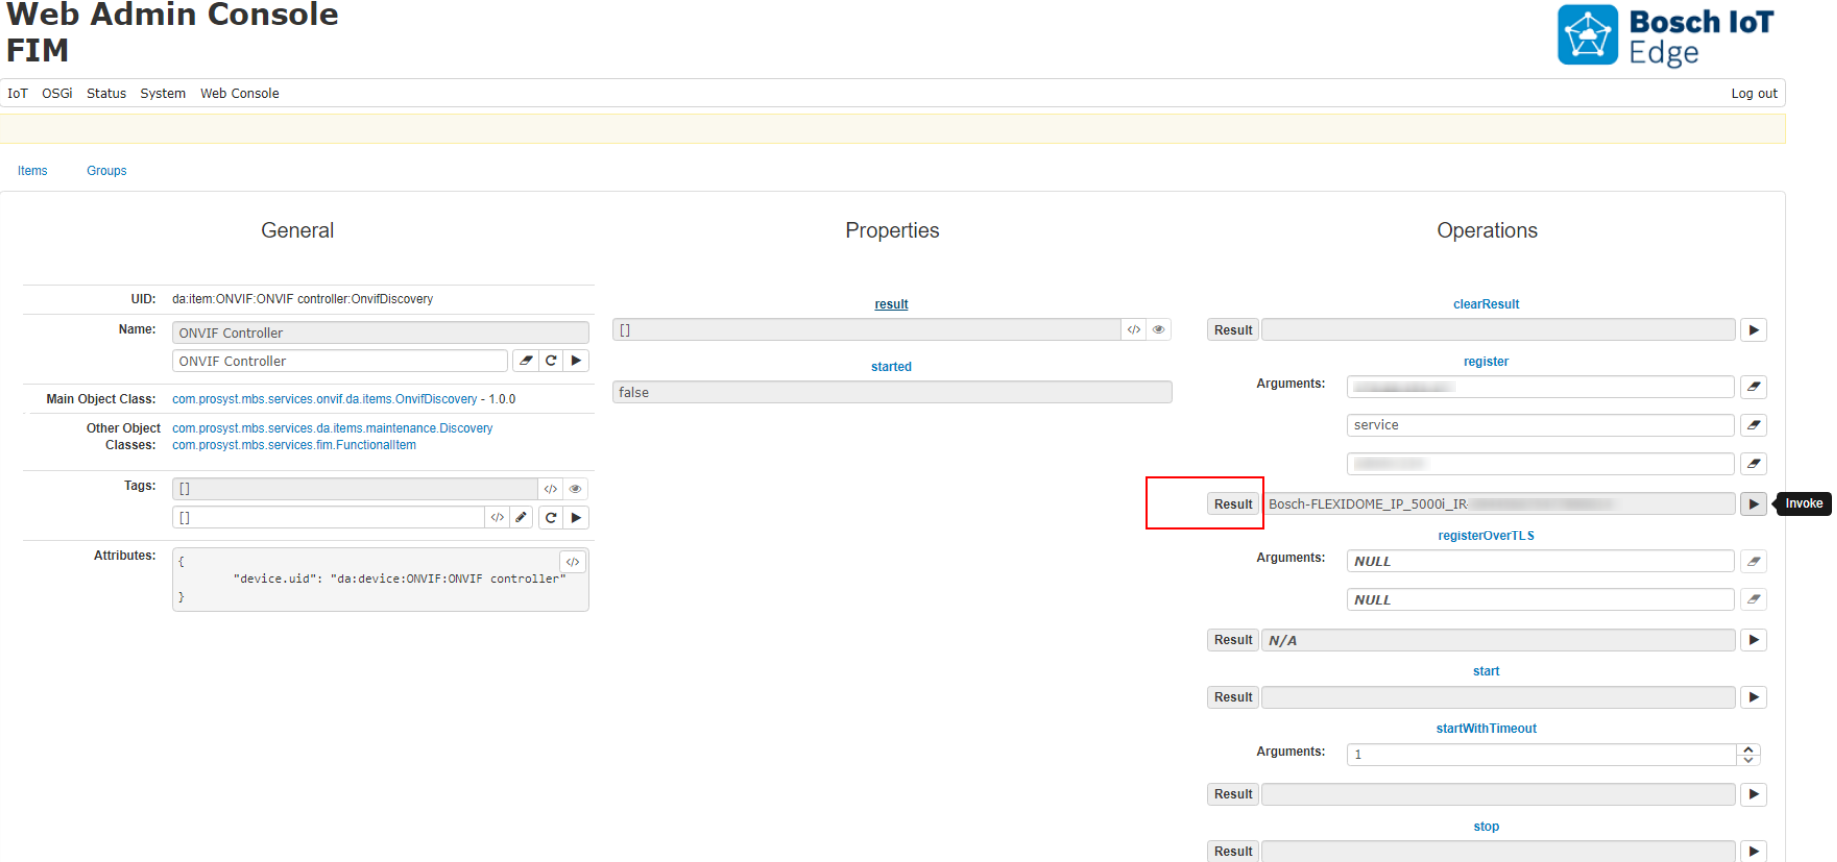
The ONVIF functional items, registered for that camera, will be available in the main view:
Using TLS Certificate Authentication
ONVIF TLS Authentication is used for the best security choice when connecting to ONVIF Device. The ONVIF TLS Configuration must be configured with the right key store credentials and path in order for the TLS authentication to work.
Setup ONVIF Key Manager
The Keystore is configurable for TLS Authentication using the ONVIF TLS Configuration with PID: com.prosyst.mbs.impl.services.onvif.OnvifTLSConfiguration. To view the configuration, in the Web Admin Console, navigate to OSGI > Configuration.
The ONVIF Device can be registered using the Discovery Item - operation registerOverTLS and providing the address of the device and an alias for the specific key inside the provided key store: