If the Kit Manager is running on the platform, most conveniently you can install the Cameras and Home Device Manager bundles altogether by executing the "Cameras DA HDM Support" install script. In addition, to have the Home Device plugin in the Web Admin Console you need to execute the "Device Access HDM Web Admin" install script.
Use the following command on the runtime console:
kitman.install "Cameras DA HDM Support"
Then type
kitman.install "Device Access HDM Web Admin"
Home Device Page
The user interface to camera management is available under the HDM page of the Web Admin Console.
Make sure that the OSGi Runtime contains the bundles required for Camera and Home Device Manager support and for its Web UI.
Open a browser window and go to the URL http://<osgi_host>/system/console and log in by using the default user name admin and password admin. On success, the Web Admin Console page will appear. If the default port 80 is used by another application, the URL will be available on the secondary port - http://<osgi_host>:8080/system/console
In the Web Admin Console select the IoT>>HDM tab.
The Devices tab of the Home Devices page shows the devices registered in the Home Device Manager. Here, depending on the capabilities of the relevant protocol adapter, you can request initialization information from a device by executing an "add" operation, force the adapter to perform a search for devices with specific features, and remove devices.
Managing Camera Devices
Adding Cameras
To send a request for initialization to a camera device through a protocol adapter follow these steps:
Navigate to the IoT>>HDM tab of the Web Admin Console.
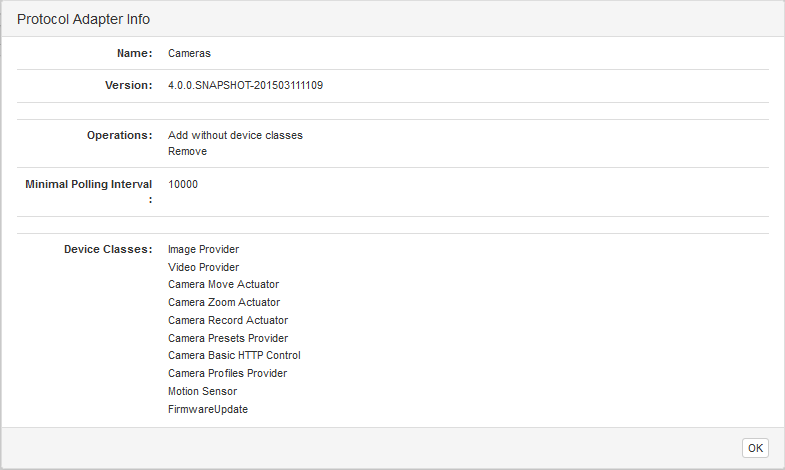
From the Protocol Adapter combo box select the Cameras adapter. To get more details on the protocol adapter select the Info button, which opens the Protocol Adapter Info window:
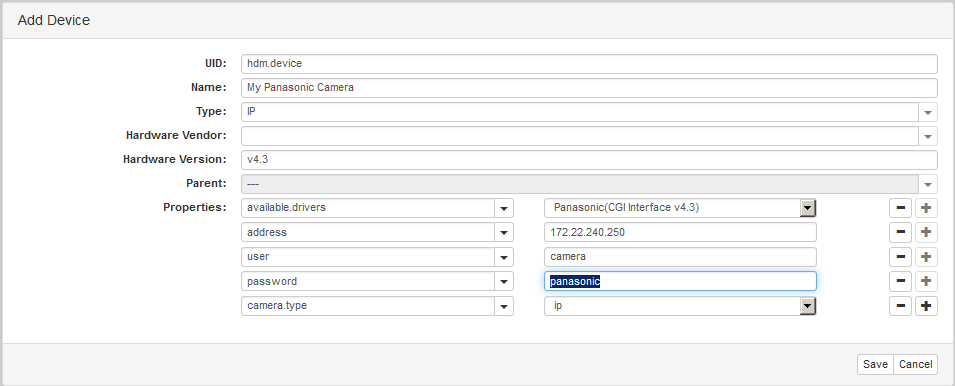
Click the Add button. Note that the button is disabled if the protocol adapter does not support the operation. In the Add Device dialog that appears, fill in the properties of the camera device.
Select Save to continue the operation. If the add request is successful, the newly registered camera device will appear in the Devices table.
Removing a Camera
Click the button for the camera device you wish to erase the data about from the Home Device Manager.
Filtering Shown Cameras
In the filter field at the top left of the Devices tab, type a filter to see only devices of interest. The filter has to be in LDAP Search format, and it can contain attributes UID, name, status, vendor, version, type, adapter and device.classes. If a device has additional custom properties, you can include them in the filter as well.
Click the Apply button.
Executing an Operation on a Device Class Object
In the Devices tab, click the button for the target camera.
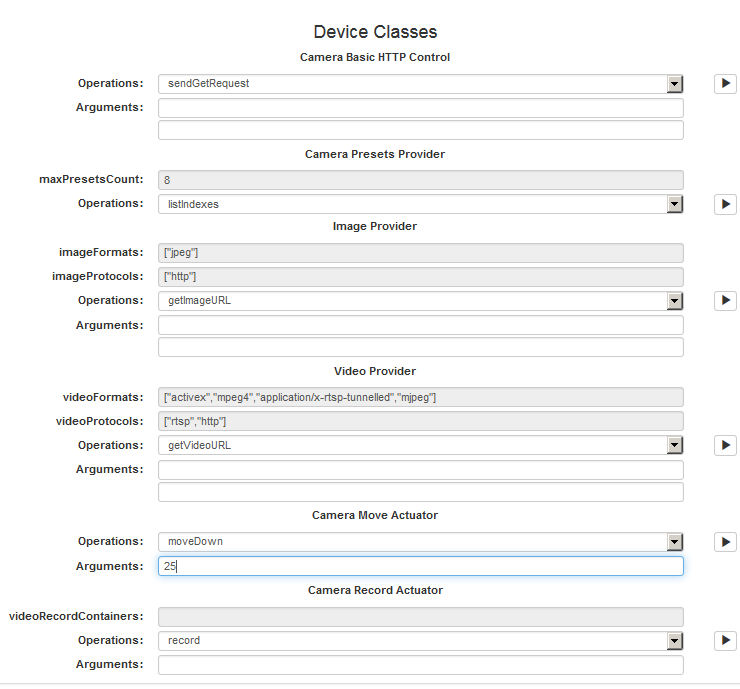
In the shown Device Information dialog, locate the Device Classes section which lists the contained device class objects. The device class object's operations are available in the Operations box just underneath its device class label. The ones that are subjects to modification have an arrow button .
From the device class specific Operations box, select the operation and if needed fill in its input arguments in the fields appearing underneath. For an array input argument, separate its elements with commas. For a Map input argument, specify its entries as a comma-separated list of "key=value" pairs.
To execute the operation, click the button next to the Operations drop box.
Click the tab to close the dialog.
If the operation returns some result, it will appear in a pop-up: