![]()
![]()
![]()
![]()
|
|
|
|
|
Using the KNX Configuration Wizard
To be able to do that, you must first configure the KNX protocol adapter. The setup procedure consists of the following:
Once it is finished, the information about the KNX devices and their mapping will be exported to ConfigTree where the HDM module can access it.
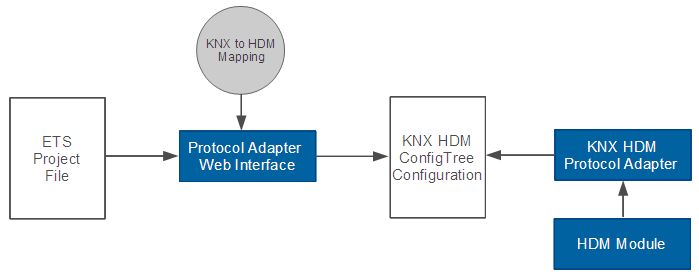
The KNX module comes with a Web interface that guides you through the procedure. To start it, go to your Web Admin Console and click on the KNX Config Tab.
Step 1: Importing an ETS 4 and 5 Project File
Import an ETS 4 or 5 project file (.knxproj) that contains the settings and configuration to the KNX network you are currently connected to.
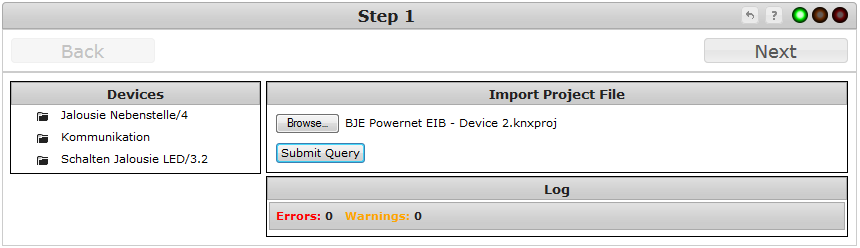
If the information in the Devices tab is correct, Click Next.
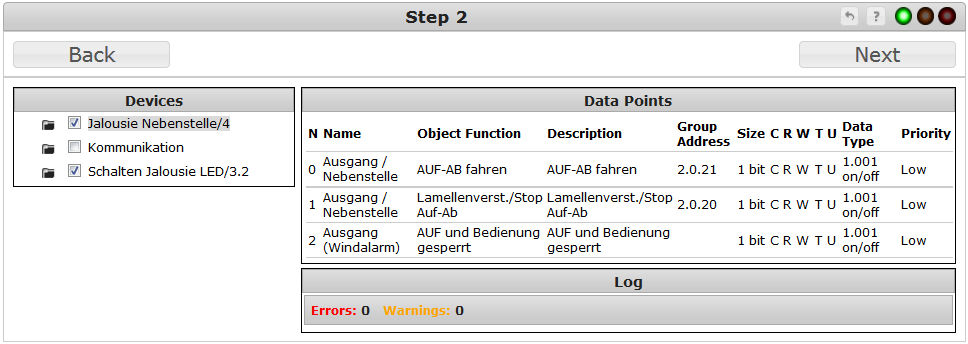
Step 2: Selecting Devices
Select the devices that you would like to be able to control via the Home Device Manager.
By clicking on each device you will see a list of its Datapoints (check the Datapoints section in the Technology Overview) along with their descriptions, Group Addresses (check the Group Addresses section in the Technology Overview) that have been assigned to them (if any), flags, data types and priority.
Select the devices and when you are ready click Next.
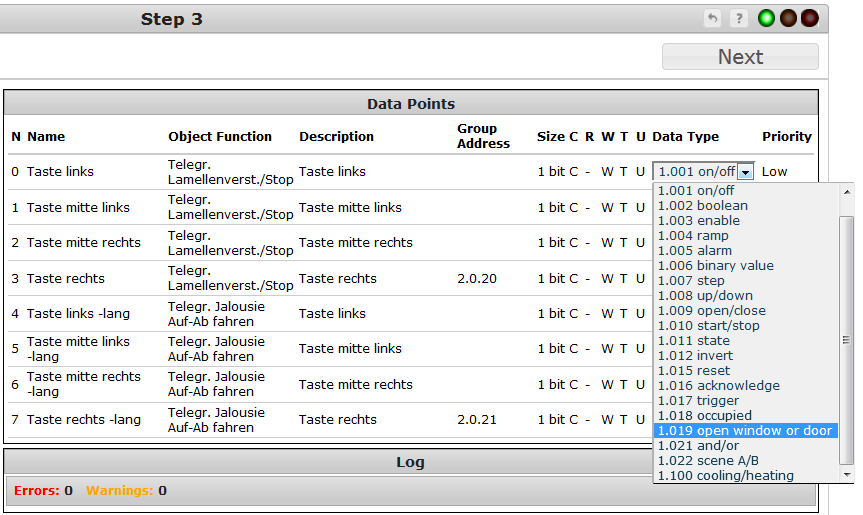
Step 3: Selecting Datapoint Types
Go through the list of Datapoints of your devices and make sure that their types are set correctly:
Do this for all devices and then Click Next.
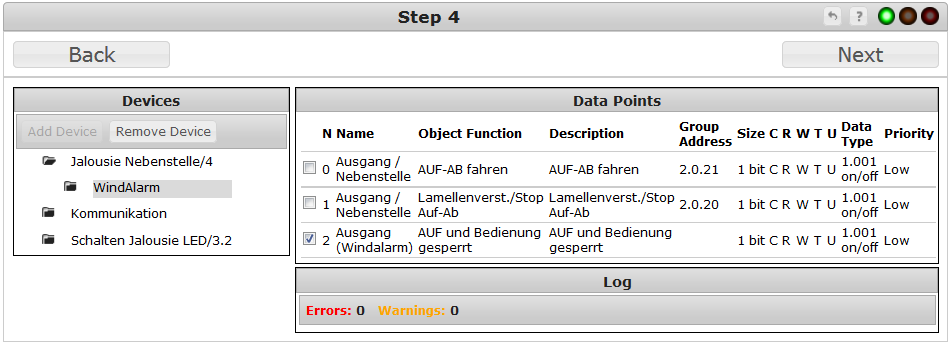
Step 4: Creating Child Devices
A complex physical device that has more than one function, is typically represented in HDM as several devices in a parent-child relationship.
In order to manage a complex device via HDM, you must create child devices for it and distribute its properties among its children:
Do this for all devices and then click Next.
Step 5: Creating Device Class Object Mapping
The Home Device Manager works with universal interfaces for device management called Device Class Objects:
In order to manage your devices via HDM, you must attach one or more of these interfaces to each KNX device, registered in HDM and map the KNX Datapoints to Device Class Object properties.
Attaching Device Classes
To attach a Device Class to a KNX device:
Mapping Datapoints to Device Class Object Operations
To map a Datapoint to a Device Class Object property:
Mapping a KNX Sensor
The Home Device Manager contains generic interfaces that can be used for gathering data from different kinds of sensors:
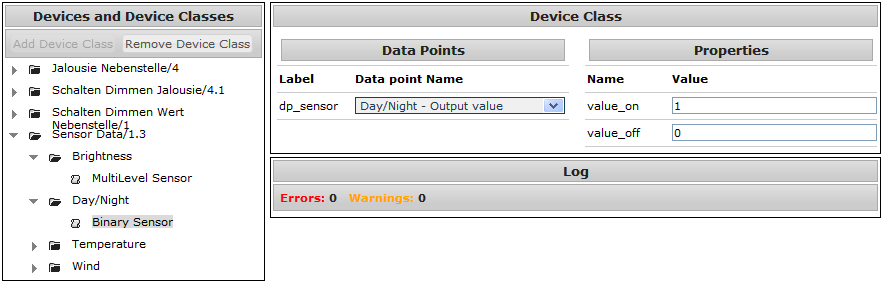
Binary Sensor
The Binary Sensor interface represents a sensor with two possible states. To map a KNX device to a Binary Sensor:
The following example maps a simple light detecting device to a binary sensor.
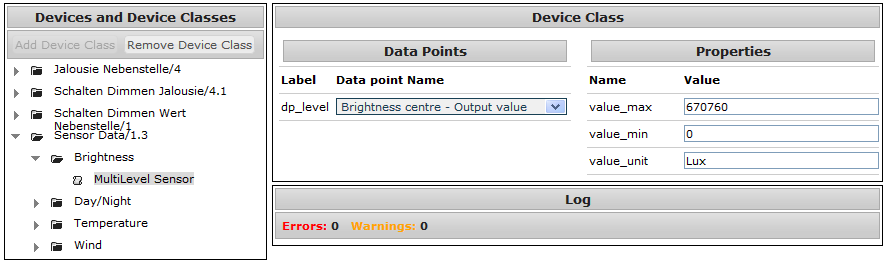
Multi-Level Sensor
The Multi-Level Sensor interface can represent any sensor. To map a KNX device to a Multi-Level Sensor:
Mapping a KNX Switch
The Home Device Manager contains generic interfaces that can be used for controlling different kinds of switches:
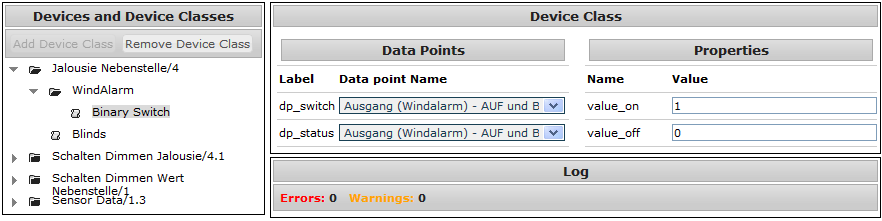
Binary Switch
The Binary Switch interface can represent any switch which is used for turning a device capability on or off. To map a KNX device to a Binary Switch:
The following example maps the Windalarm Datapoint to a binary switch which allows users to turn it off and on via HDM.
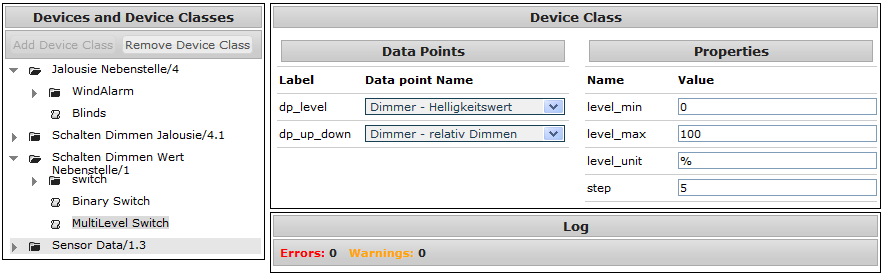
Multi-Level Switch
In most cases the Multi-Level Switch interface is used for dimmers. To map a KNX device to a Multi-Level Switch:
The following example maps a dimmer device to a multi-level switch. The dimmer can also function as a normal On/Off switch. For this reason we added an additional Device Class (of type Binary Switch) to the device and mapped it to its on/off datapoint.
Key
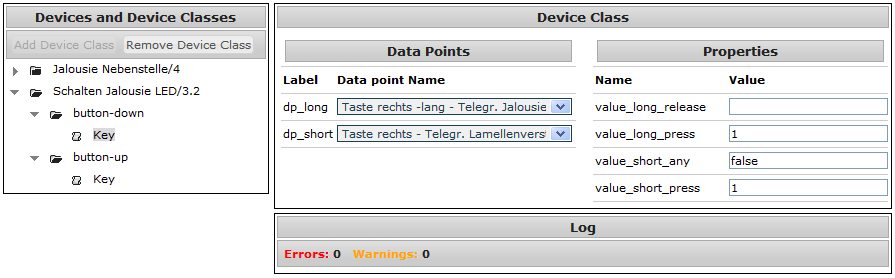
The Key interface is used for controlling buttons that supports different functions on short and long press. To map a KNX device to a key:
The following example maps a two button device to two keys. The two child devices (button-up and button-down) control the same Datapoints, but they sent different values to them: the button-down sends "0" and button-up (as you can see in the screenshot), sends "1".
When you are ready, click Finish to end the setup procedure: