Having installed the Eclipse IDE, follow the next steps to install the plug-ins:
Start the Eclipse IDE.
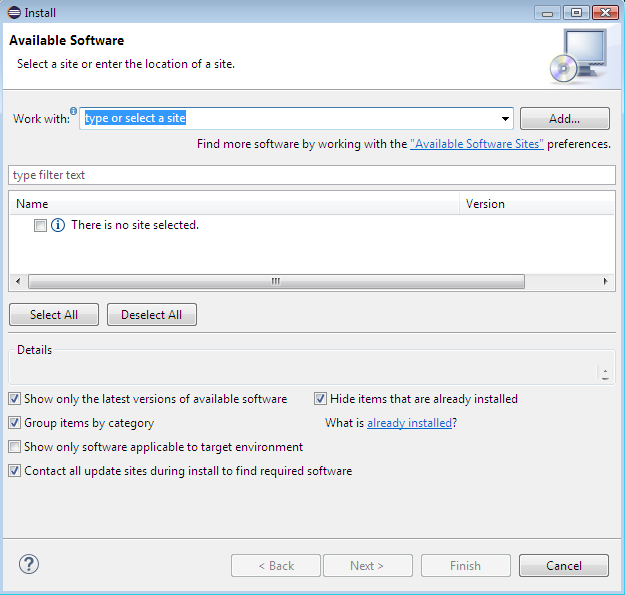
From the Eclipse main menu, click Help > Install New Software
The Install wizard appears.
Click the Add button next to the Work with combo box in the Install wizard to add a new site.
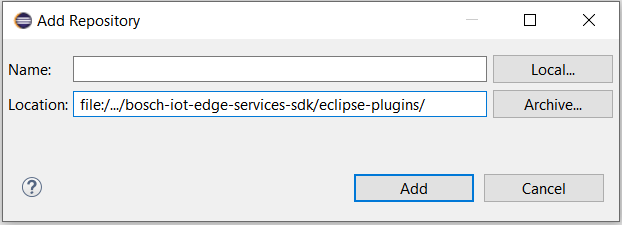
The Add Repository dialog appears.
Click the Local button in the Add Repository dialog to enter into a file selection mode and locate the Eclipse plug-ins folder of the SDK, <bosch-iot-edge-services>/eclipse-plugins, on your local file system. Click Add.
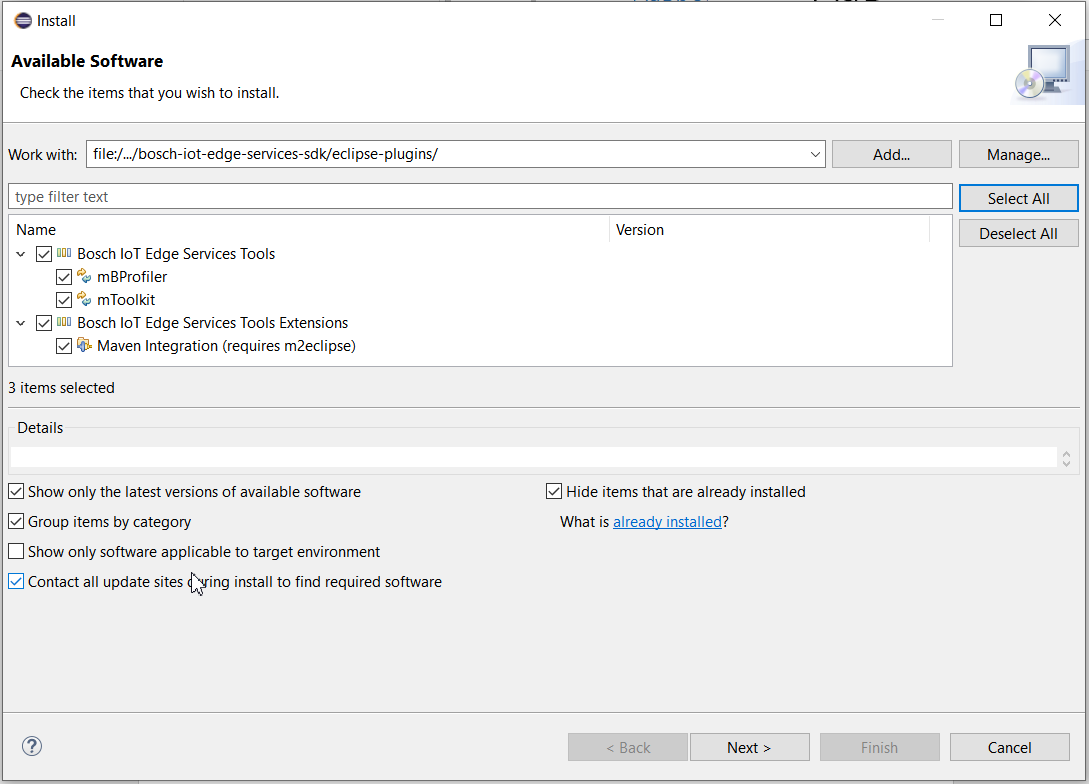
Back in the Install wizard select the SDK root checkbox and click the Next button.
Installing the SDK Maven Support features requires the m2eclipse plug-in if it is not already available on the Eclipse installation you are using. For normal SDK usage you can just select the Bosch IoT Edge Services Tools or Bosch IoT Edge Services Tools Extension option.
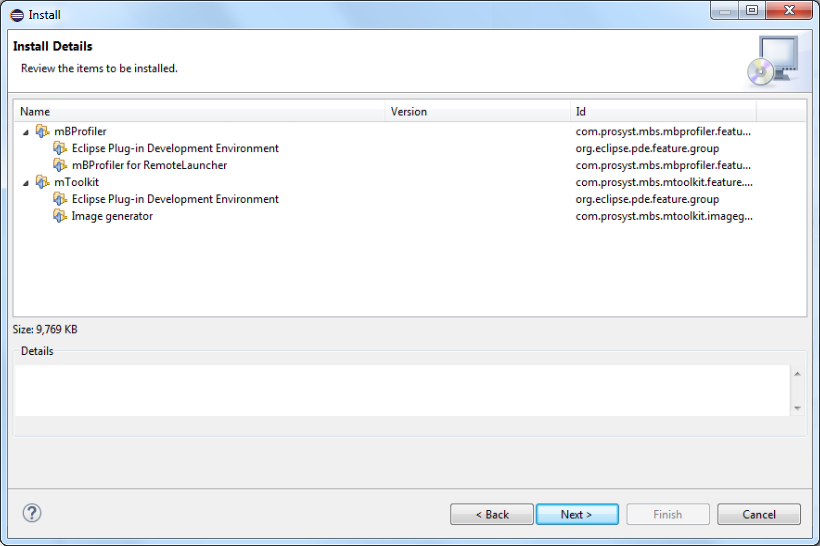
View the installation details in the next screen of the Install wizard and then select Next.
Accept the license agreements of the software components in the next screen on the Install wizard and select Finish to install the plug-ins.
The Finish button at the license approval page sometimes might be disabled. This can be resolved by restarting the installation from the very beginning.
The installation begins. Sometimes, the installation may take several minutes.
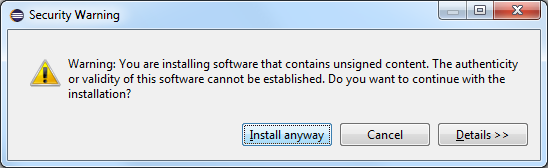
Select Install anyway to continue installing when a security warning about unsigned content appears.
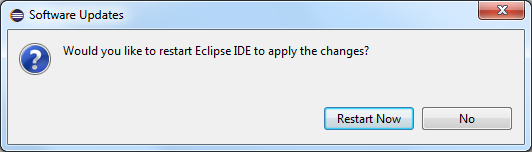
Click Restart Now to restart your IDE when installation completes and apply the changes you have made.
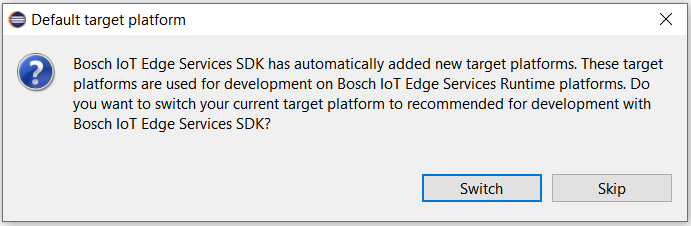
After Eclipse is restarted it will prompt you if you want to change the target platform. Click Switch to confirm and start using the Bosch IoT Edge Services development environment.
To verify that the installation has completed successfully, start Eclipse and go to Help > About Eclipse > Installation Details. In the Eclipse Installation Details dialog verify that all SDK plug-ins you have just selected are indeed installed.
Configure Eclipse for OSGi Development
Set the Target Platform
The Eclipse plugins provide target platforms containing all components needed for developing OSGi bundles from Eclipse.
From the Eclipse main menu, select Window > Preferences.
Go to the mToolkit preferences page and make sure that the OSGi runtime location is properly configured. In case you have changed the runtime location, a message about adding new target platform will appear asking you to confirm setting a default PDE target platform related to the SDK.
Go to the Plug-in Development > Target Platform. Make sure that the OSGi target platform is set.
Click OK to apply the changes.
Set Java Compliance Level
The OSGi APIs are intended for devices with smaller resources and have been developed for Java platforms with lighter performance. The Java platform APIs supported by this environment are mostly based on JDK 1.8 and it might be necessary to change the compliance level of the Eclipse Java compiler.
Hence, to have the Java content of your bundles compliant with the JDK version supported by the JVM on the target device:
From the Eclipse main menu go to Window > Preferences.
Click Java > Compiler and change the Compiler compliance level to 1.8.
Click OK to apply the changes.
Set the Execution Environment
The Java execution environment settings allow you to assign a JRE as the implementation of a specific execution environment (EE) required for the proper operation of your bundle on the target OSGi-enabled device.rUse the Window > Preferences menu option and go to Java > Installed JREs > Execution Environments.
Select the execution environment your bundle will be developed against and on the right select the JRE.
Click OK to save the changes.
Create and Model an Image Description File for Bosch IoT Edge Services
Create an image description file to hold the settings for the later image generation.
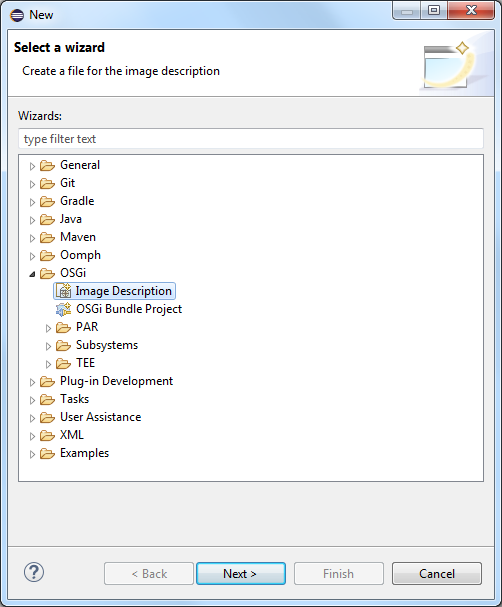
a. Select a project/folder you have created in advance in one of the navigation views of the workbench and from the File menu select File > New > Other.
b. In the shown dialog, expand the OSGi node and click Image Description to open the corresponding wizard. Click Next.
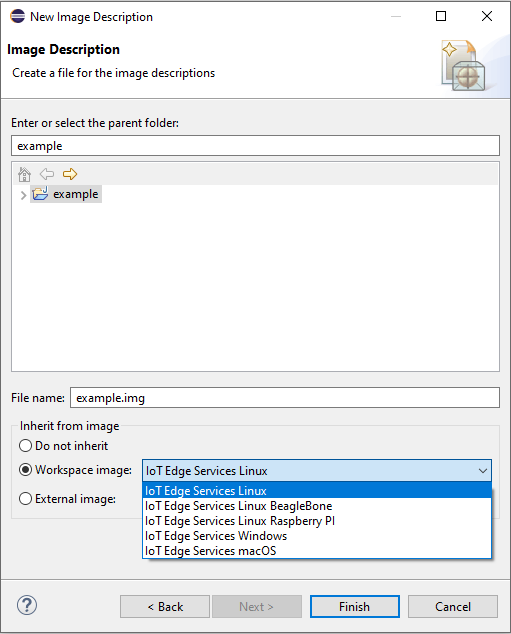
c. In the New Image Description wizard specify the location and name of the image description as well as if it will inherit the settings from another description or if it will be created from the scratch.
The runtime comes with a predefined target image IoT Edge Services for the respective target platform. A target image represents an instance of the runtime with features designed to meet the needs of a production use case deployed on a specific platform.
d. Click Finish.
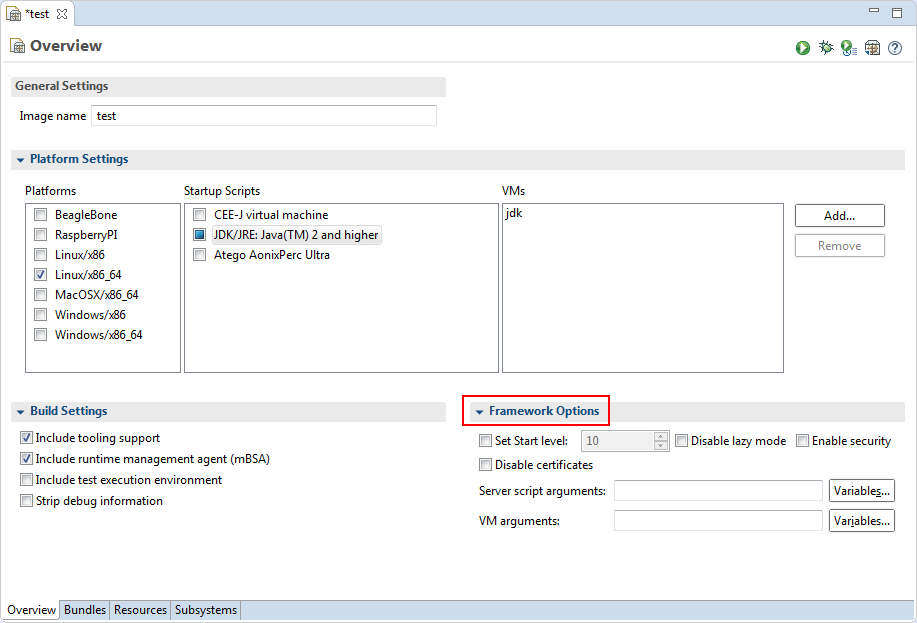
On success, the image will be automatically opened in the editor of the Eclipse workbench.
Add the bundles providing image's functional features. In the image description editor, configure the set of image bundles in the Bundles pane. You can insert bundles from the active PDE target platform, from the workspace and from a location external to Eclipse. Use the Add Required Bundles button to have the dependencies of specific image bundles resolved by automatically adding the required bundles from the target platform.
Select the platform the image will execute on. In the Platform Settings > Platforms pane, select the device platform. In the Platform Settings > Startup Scripts choose the OSGi startup script corresponding to the JVM the target device will run.
(Optional) Include the JVM in the image if it is not preloaded on the device. In the VM section, if necessary include the JVM the runtime will execute upon.
(Optional) For remote management from Eclipse activate tooling support in the image. In the Build Settings pane, select the Include tooling support option.
(Optional) For detection on OS level of faults and high resource consumption as well as for remote launching of the OSGi runtime image in normal, debug or profiling mode from Eclipse, include mBSA. In the Build Settings pane, select the Include runtime management agent (mBSA) option.
If needed, in the Framework Options pane configure the OSGi framework features as Enable security and turn off lazy activation support:
Prior to image generation and deployment, you can run an emulation of the image based on the image description file.
Generate the image
To generate an image from the image description file configured in accordance with the target platform:
Right-click on the image description file in the navigation view of the workbench and use Export menu to launch the Export dialog.
In the Export dialog, expand the OSGi node and select the OSGi Image node to launch the corresponding wizard. Click Next.
In the OSGi image builder export wizard specify the image description file (the one you have selected is automatically set) and the destination of the resulting image as a directory or as an archive (zip, tar or apk).
Structure of Generated Images
The images generated by the Image Builder have the following common directory structure:
mbsa
bin – Contains the startup scripts and configuration files for mBSA.
lib – Contains the native libraries of mBSA components.
osgi
bin
vms – Contains the JVM specific startup scripts and configuration files.
bundles – Contains the bundles of the image.
lib
framework – Contains the OSGi framework and the native libraries it uses.
mbprofiler-agent – Contains the profiler agent for the target platform and the API of mBProfiler.