![]()
![]()
![]()
![]()
|
|
|
|
|
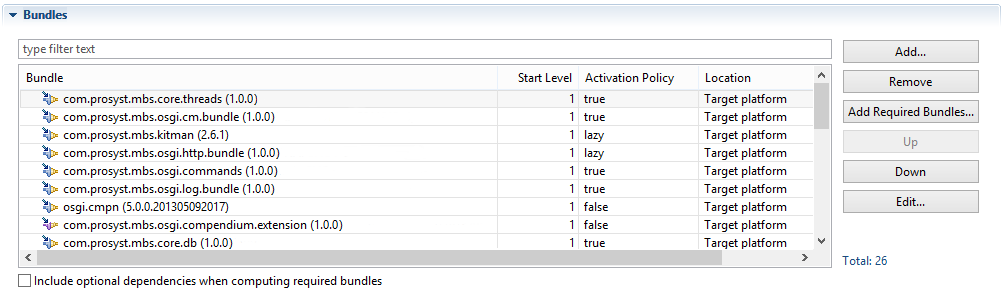
Bundles extend the platform with specific functionality interacting with each other and with the framework. To prepare the list of bundles of the image, go to the Bundles section of the Image Description file. When ready, do not forget to save the Image Description file.
When an OSGi Image created with an earlier version of the SDK is imported, mToolkit will automatically ask if the bundles should be updated.
Adding Bundles
The Image Builder supports several formats for including bundles in an image reflecting the most popular ways in which bundles are distributed.
There are some bundles that are not eventually included in the resulting target image (for example, the bundle holding Javadoc API documentation for all bundles in the target platform).
If you include a bundle that contains native libraries, depending on the target platforms selected in the Platform Settings section a proper version of the bundle will be included in the generated target image.
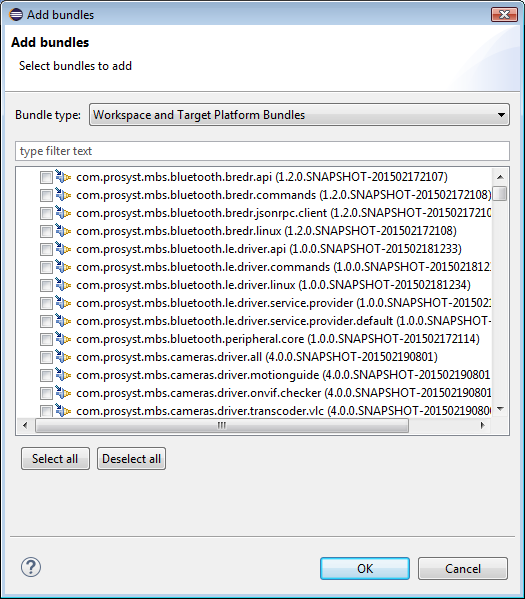
From the Eclipse Workspace
As previously mentioned, to be able to add a bundle from the active workspace to your image, it must be distributed as a plugin project that is being developed or as an archive in the target platform.
As a result, a list will appear showing the bundles available as projects in the workspace (Maven including) and in the target platform definition that are not already added to the image.
From a Location Outside Eclipse
To extend the image with bundle JAR files residing in your local file system:
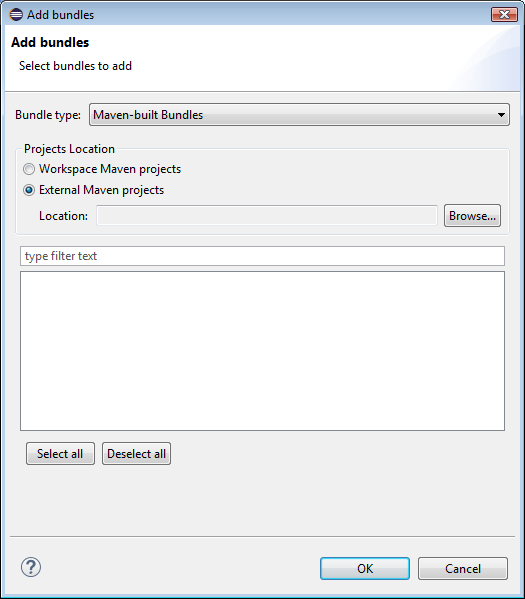
As Maven Projects
To add bundles which are modeled as Maven projects either from the Eclipse workspace or from a location outside the development environment:
Resolve Dependencies of Bundles
To include all bundles from the target platform and from the workspace that are needed to resolve the dependencies of the bundles currently added to the target image, click the Add Required Bundles button. You can choose to include optional dependencies by selecting the Include optional dependencies when computing bundles requirements checkbox.
Configure a Bundle's Activation Policy
You can define the activation policy of the bundles included in the target image by choosing an option in the Activation Policy column of the bundles table or from the properties of the bundle:
Specify a Bundle's Start Level
The start level of a bundle determines its startup priority. If its level is higher that the one defined for the framework, it will not be started. By default, upon adding a bundle its startup level is set to 4. To change it, double-click on the Start Level property and enter the new value, or click the Properties button and enter the level there.
Editing a Bundle Entry
To change a bundle entry for example with a new update: