This document contains general information about how to manage commands via the HAM Web UI and also descriptions of the native commands that come with the HAM module itself.
In the Commands tab of the Home Automation page, click the icon in the top right corner.
In the Add Command dialog, enter the following data:
Enter a name for the command (optional).
Type the name of the application that this command is part of (optional).
Select a command type.
Populate the command with the required properties. The properties depend on the command's type (see the next sections of this document).
Save the command.
To edit a command, click the button next to it.
To execute a command, click the button dedicated for it.
For more information about the following list of commands and instructions on how to create them programmatically, see the Developer Guide.
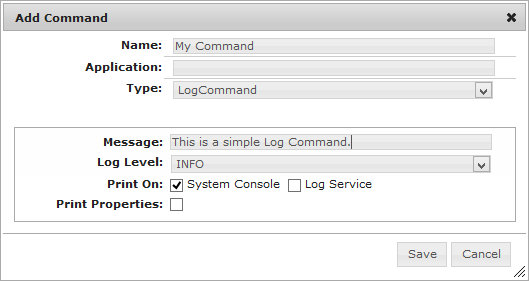
Log Command
The Log Command sends log messages to the OSGi Log Service and to the system output.
Message - Type the message you want to log. The message can print values of the properties of its rule by using the ${<property_key>} syntax. For example, if your message is "Event with ID ${event.id} has arrived." and the container rule has an event.id property which is set to "5", then the logged message will be "Event with ID 5 has arrived.".
Log Level - Select the level of the log message.
Print on - The message can be forwarded to the System Console to the OSGi Log Service or to both if you mark both check boxes.
Print Properties - If you mark this the logged message will also contain the values of all input parameters received from the rule that this command is part of.
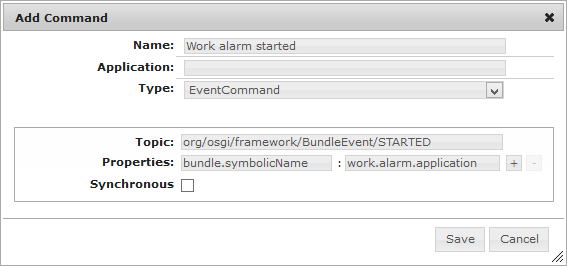
Event Command
The Event Command is a command that fires OSGi events. It is used to notify third parties when an automation condition is satisfied.
Topic - Type the topic of the event, which will be fired by the event command.
Properties - Enter the property(ies) of the OSGi event as key-value pair(s) in the text fields. Use the "+" and "-" buttons, to add and remove the properties.
Synchronous - Check this box if you want the event to be delivered synchronously.
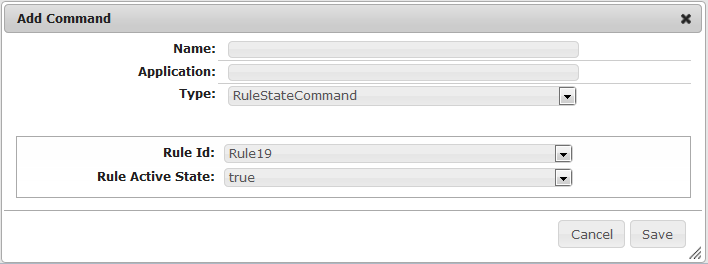
Rule State Command
The Rule State Command is a command that enables/disables a single rule.
Rule Id - Specify the rule that you want to enable/disable by selecting it from the Rule Id menu.
Rule Active State - Specify whether the command enables a rule ("true") or disables it ("false").
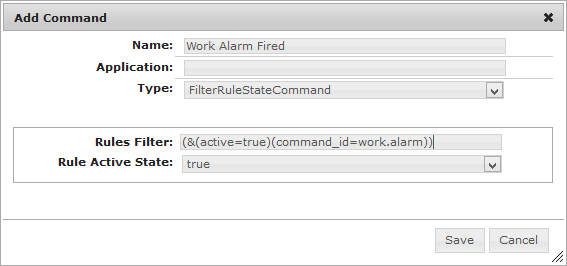
Filter Rule State Command
The Filter Rule State Command is a command that enables/disables a set of rules matching the specified filter.
Rules Filter - Specify the rule that you want to enable/disable by matching its properties with an LDAP filter. Thus you can control several rules with one command.
Rule Active State - Specify whether the command enables the set of rules ("true") or disables it ("false").