Optional. In the Commands tab create the commands that will participate in the scene.
In the Scenes tab, click the icon in the top right corner to start creating the scene.
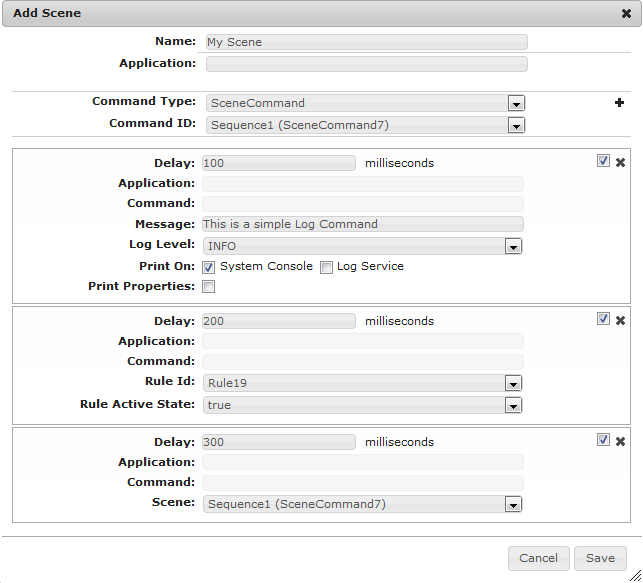
In the Add Scene dialog, enter the following data:
Enter a name for the scene (optional).
Type the name of the application that this scene (and its commands) are part of (optional).
Add commands to the scene by following these steps for each one:
Select the automation command type from the Command Type drop-down list.
If you will use a ready command, select it from the Command ID drop-down list.
Click the button to add the command to the scene - the command will appear as the last one to be executed.
Go to the command pane and enter a delay if needed.
Use the button from the command pane to remove the command from the scene.
Use the checkbox next to the to indicate whether this command should be enabled/disabled during the scene's execution. For example, you can uncheck the box temporarily if you know that the command will take quite a long time for its execution and thus slow down the whole scene execution. In order to execute the scene quickly, you can start it with this specific command disabled. You can enable it at any time later by simply checking the box.
If the command is a predefined one (specified in the Command ID drop-down list), edit its parameters if required. If the command is to be defined, specify its properties.
If you edit the properties of a predefined command from a scene your changes will be reflected in the original command itself.
Optional. You can add another scene as part of this one and create a parent-child relationship between them.
To complete the scene definition, click the Save button.
To edit a scene, click the button next to it in the Scenes tab of the Home Automation page.
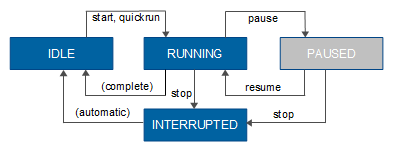
Handling Scene Lifecycle
The scene has the following states:
You can start, quick run, pause and stop each scene in the Scenes tab.
For start, click the button. The button toggle to a pause one.
For quick run, i.e. execute scene's commands without the defined delays, click the button.
For pause scene's execution, click the pause button.
For stop, click the button.
For more information about scenes and instructions on how to create them programmatically, see the Developer Guide.